There are some do's and don'ts when repointng existing brickwork.
Before the state government brick works a lot of bricks came out of Maylands, Armadale and Midland and a variety of other places around the state. These bricks are fragile compared to the modern day fired brick. The SG bricks were a pressed solid.
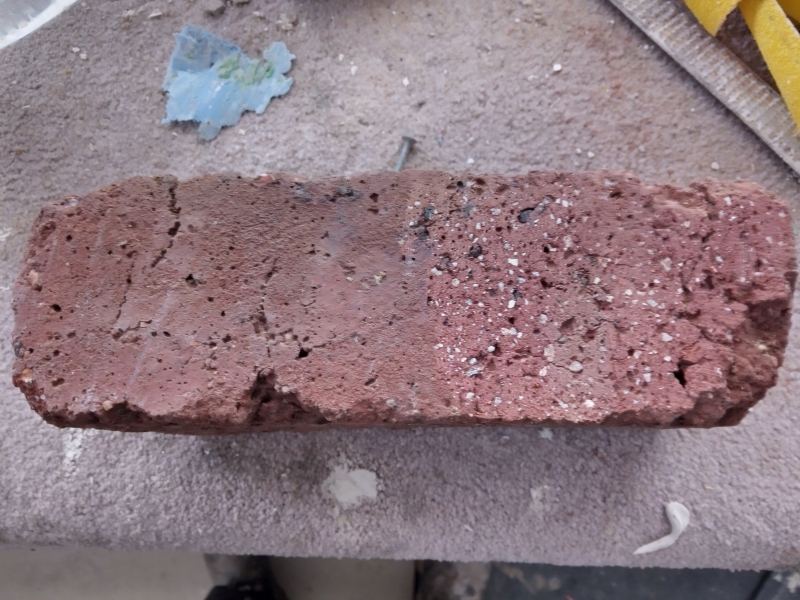
You can see the existing face and cream cement plastered over the brick inside the corbeled triangle. The clean outside face was made by grinding the face off the brick and mortar. This has made the face of the brick very susceptible to water ingress. As the face is now softer the water ingress will allow frost damage which will start to crumble the face of the brick over a period of time. This has been done by an inexperienced person. The wall is in a frost prone area. Photo taken Nov 23

You can see how the grinder has exposed all the little holes that will allow the ingress of water. You could say that the right hand face of the brick will allow 100% of the water to penetrate based upon the surface area. The left face will allow say 15% because of the harder face. That is the skill of an old brick maker which is the ability to achieve that hard face.

A lime and sand mortar can be scratched out with a recip saw or a carborundum blade. There are air tools too. If the existing mortar joint is very tight it is impossible to joint it properly and has to be made wider with a grinder. A 125 mm diameter blade works well. It also has to be well washed with water.
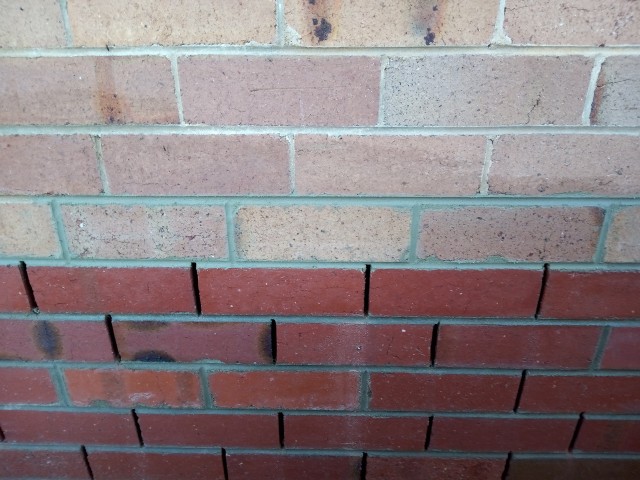
The object is to make the wall look like it was built yesterday, not like below (more handyman). The most important aspect of this is to keep the face of the brick clean.

This job was done in the middle of winter so it is wet. The mortar joint will vary in setting time based upon how much moisture it contains.
You can see the ragged edges on the joints, these will need to be cut off with the trowel.

A little further along

As you get closer to finishing you have to clean the perps out.

You do the bed joints on day one and the perp joints the following day. Starting at the top of the nominated area to be re-pointed, do each bed joint leaving the perps out. As you finish a bed joint you can wipe a sponge longitudinally to wash any mortar blemishes off the brick.
To do the perp joints you will need a grout bag as shown below.

You can flatten the joint out with a small tool which is handy for scraping the excess mortar off also.

Scrape as much mortar off with a trowel or small tool. A sponge can help also. The final mortar joint below is ready for the detailing. You can see the smudges of mortar on the arris of the brick.

Now get a paint brush and with a bit of water wipe the smudge away. You do the bed joint first from the top bed joint and work your way down course by course cleaning with the paint brush as you go. In this case because of the weather the perps were done the next day.

All the red bricks were repointed as were the cream bricks on the left

Very time consuming to do but worth the effort as the building was still in good condition and has been in the same family since 1903. The existing house walls are shown below. The verandah was added in 1950 using Cardup's brick called Salmon Gum.

You can see the perfect application of the stopping mortar on the brick mortar joints. At the time of the photo this work was 118 years old.

Cracks appear for many reasons and sometimes it can be repaired and reinforced with a good result.

Remove all the bricks so that there is enough exposed brick (M1) to allow two 6 or 8 mm steel rods (galv) to reinforce the mortar joint.

In this case two 6 mm galvanised rods were added into each mortar joint above the solid brick course over the lintel.

Where possible bend the rod around the corner or overlap the rods at least 300 mm. Make sure to wet the wall and new bricks so that it all bonds together.
